Thursday, February 18, 2010

Paint

Once the drywallers were finished with the walls and ceilings, we were ready for paint. We basically took an entire weekend and painted the five main rooms of the house (kitchen, front room, bathroom #1, bathroom #2, master bedroom). We used Sherwin Williams' Duration paint for basically our entire house. It's awesome because it is low-VOC and low odor. Making it not only better for the environment, but a hell of a lot more pleasant to actually use. Plus, you can scrub it clean if something spills on it. Trim and doors are done in a semi-gloss finish and walls and ceilings are an satin finish.

Here's Matt's mom taping off the kitchen ceiling. We chose to leave the two wood panelled walls in the kitchen rather than dry-walling over them. At this stage, we are planning an entire kitchen remodel in the not-too-distant future. So, the only thing we painted in here on our first go-around was the ceiling (we painted this so we could install the new light fixtures). The ceiling in the kitchen is painted Sherwin Williams' Modest White (we loved this color so much, you'll see it again and again in our house).

Our bedroom was the first room we painted (we wanted to be able to get our furniture in there STAT). Here's what our bedroom looked like before we got our hands on it:

All of the trim was painted Sherwin Williams' Pure White. The top portion of the walls is painted Sherwin Williams' Sporty Blue. The bottom portion of the walls and the ceiling are Sherwin Williams' Modest White. Here's my mom fixing some of the little areas where the paint seeped under the tape.

After the bedroom and kitchen ceiling, we moved onto the front room. We used an extension ladder to get all the way up to the vaulted ceilings. We primed all of the drywall and the small bit of wood that we'd chosen to leave on the walls. Drywalled walls are painted Sherwin Williams' Grayish. Woodpanelled walls are painted Sherwin Williams' Functional Gray.


Priming the wood panelled walls took forever, but it was totally worth it (a special thanks to our friends Mike and Nick for the help). I love how this little nook looks.


This is the front room painted after all of that priming. I love the slight contrast between the wood walls and thr drywalled walls. Radiator, closet doors and, eventually trim, are Sherwin Williams' Pure White. This picture was taken prior to the trim being put up. That'll be another post.


The largest bathroom in the house (and the one Matt and I use the most) was Pepto pink when we moved in. I'll be honest, it was hard to be in there for more than a minute or so when we first moved in.

This bathroom has been painted Sherwin Williams' Tidewater. The ceiling is Modest White. The closet doors, trim and the vanity are Sherwin Williams' Turkish Coffee. You can see a little of the Turkish Coffee on the mirrors.


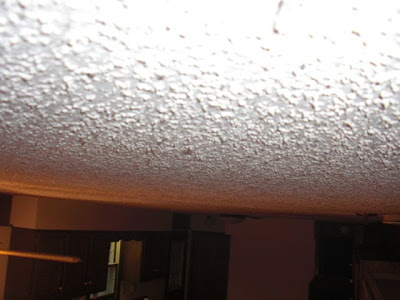
My sewing room is quickly becoming one of my favorite rooms in the house.  Before I got my hands on it, it was all white with, you guessed it, wood panelling!  Here's the before (and my fantastic father-in-law helping us get ready to remove the popcorn from the ceilings!): 

We painted the walls Sherwin William's Essential Gray in an Eggshell finish.  The trim and wood wall were primed and painted with Sherwin William's Pure White in Gloss.  The first picture is my little photo montage to some of the costumes I recently finished (a little more on how that came together soon), but in the picture you can see the wall color and the trim.  The second picture is actually the same corner of the room that we saw in the before picture above.  It shows the wood wall halfway through painting (hence the splotches in the upper corner where I realized I still had a little spackling to clean up).  This picture was taken before the ceiling was painted, but it still gives a good idea of the wall colors.

Floors

As I've mentioned before, the previous owners of our house were not interested in maintenance or updating the house before selling it (and they wondered why it was on the market for almost 2 years!). The carpets were bad. Very bad. Expecially down the hall and around the fireplace. Because we were covering the overwhelming wood panelling in both of these areas, we thought that hardwood floors would be a nice addition. As I mentioned in my last post, this is one of the few projects that Matt and I did not do ourselves. A family friend of Matt's parents knew a professional who could buy and completely install the hardwood floors for cheaper than the materials alone would cost us. Though we were up to the challenge of flooring, it made more sense to us to hire this guy since he came highly recommended and was cheap.

We chose a Red Oak for the floor. Our flooring guy recommended it when we told him that we were interested in a durable floor that had a lot of detail. The floor is stained Sherwim Williams' Burnished Walnut. It is a beautiful color and the grain of the wood really makes this floor impressive.

Here's my brother helping us remove the last remnants of the carpet that was down the hallway and in the front room. We seriously could not have bought this house without knowing our families would be very willing to help us renovate. They are wonderful.
Installed, sanded, and stained hardwood. This picture was taken the day before the polyurethane went on.
Our very first step onto our new floors. They literally took my breath away when I first saw them after the polyurethane was put on.

Sunday, February 14, 2010

Drywall

Though Matt and I are big believers in learning how to do a project and completing it yourself, there are some projects that are a little over our heads. In addition to the roof, we hired professionals to complete the drywall and the new floors. When we bought our house, half of the walls were covered in dark wood panelling. We tossed around a lot of ideas for how to deal with all of this panelling (removing it, painting it, etc). Ultimately, we decided that the best way for us to deal with the panelling was just to cover most of it up. We hired a team of drywallers to come in and cover over half of the wood-panelled walls with 1/4 inch drywall. While they were drywalling over the wood, they also skimcoated the ceilings that had recently been de-popcorned. The skimcoating was more to give us an even surface to paint and to clean up any mistakes that had happened while we were removing the popcorn (a couple of nicks here and there).

The wood panelling made our house dark. Like a cave. Here's what the hallway looked like before we covered up the wood panelling:

And here's the after. This is after the popcorn was removed and the drywall was put up, but before the new floors went in.

Here's our before show of the living room. So dark! This was taken on our final walk-thru before we closed, so not only is the wood no longer there, the flooring has been replaced and the skylights were added. The room is so light and friendly now.
Here's the after of the drywall in the front room. We chose to leave the ceiling and beams natural wood (Matt's family owned lumbar companies, he loves the look).

New Doorway (or "The Hole")

The layout of the house was a little strange when we first bought it. The rooms were all very cut off from each other and the flow of the house was pretty choppy. Matt and I decided to open up a wall from the front room to the kitchen (these are two of the largest rooms in the house, they are next to each other, and yet have no entryway between the two). As this was a load-bearing wall, Matt and his dad had to take extra care to make sure their new supports would hold the weight. Here's the before, during and after pictures of the new doorway. I love how it looks! Most people can't even tell that we added it. It looks like it was always there.

Now I'll talk about how they did it. First, Matt and his father removed all of the wood panelling from both sides of the wall and brought the wall down to the studs.
Once the wall was brought down to studs, they built a temporary wall to support the kitchen ceiling while they took the studs out and put in new supports.
The supports were a double cripple support, which means they built a 6 inch beam using two 2x6s with a piece of MDF sandwiched in between. This beam would eventually become the header for the doorway. Supporting the beam on either side were two 2x4s cut to the appropriate height. The temporary wall was put in. The studs were removed. The top beam was put in first once the studs were removed. Then they supported the beam on both ends by wedging the 2x4s into the space left in the wall.
Once the supports were installed, the temporary wall was removed and the doorway was complete. It brightens up our room so much. And I couldn't be happier with it.

Fireplace

Our fireplace was constructed with what is called 'stuffed grout.' Basically when they layed the brick for the fireplace, they loaded it with grout, and when the next brick was placed on, the grout oozes out in-between the bricks. It looks like this:

We didn't love the look of it and all I could think of when I looked at it was what a dust trap it would be, so Matt used a dremmel-like grinding tool and removed all of the extra grout. He did this project in a weekend and it made a huge difference in our front room. Just like the popcorn ceilings though, this project was a huge mess and covered everything in a fine layer of dust. This was fine by us though as the wood panelled walls of the front room would soon eaither be covered by drywall or painted. And we planned on replacing the floor. Literally, everything was covered in dust:


Here's a close-up of the brick after Matt was done removing all of that extra grout. I think it is such a huge improvement.


And here's the finished product mid-cleanup.


And our first roaring fire in the fireplace.

Wednesday, February 10, 2010

Removing Popcorn Ceilings

Matt and I decided that it would be best for us to tackle our messiest projects first (after the roof was finished, of course). Our three messiest projects were removing the popcorn ceilings from the entire house, tuckpointing the fireplace, and adding a doorway from our kitchen to our front room.

The popcorn ceilings were a huge mess and I would not recommend doing it in a house you are currently living in. There are tools to make it cleaner (a little vacuum thing that attaches to whatever you are using to scrape. I have heard great things about these tools, but since we didn't live there yet, and we were planning on replacing all of the floors anyways, we weren't too worried about a mess and we just wanted to get the project done as quickly as possible. The only tools we used were water and some wide putty knives. All in all, it took my mother in law, my mom, and myself (with random help from other people) about 3 nights after work to remove the popcorn from 8 rooms and two hallways.

This is what my ceilings looked like before.
In an effort to make clean-up easier, we first layed down a sheet of plastic drop cloth. On top of that we layered Red Rosin Paper. The red rosin paper absorbed a lot of the liquid from the water sprayed on the ceilings and made clean-up a breeze.
Here's Matt's dad helping us with some of the prep-work in my soon-to-be sewing room:
This is what the kitchen looked like prepped. We knew we weren't replacing the cabinets in there quite yet, so we took extra care to keep them clean.
Another shot of our well-prepped kitchen.
Once our prep work was done, we got to work. We quickly found out that the most efficient way for us to work was for me to spray the ceilings while my mom and mother in law scraped of the popcorn. It comes off very easily and cleanly when wetted a little.
Grandma took over for a bit.

Here's a shot to show just how quickly it comes off. We weren't worried about the walls in the hallway because we knew those were going to be covered with dry wall in the coming days.
Here's a close-up of the hallway being done.
And this is what the popcorn in the hallway looked like when it was down. To finish the clean up, we just rolled up the paper and plastic and threw it out. The floors were left un-popcorned and the walls were eventually covered with drywall.

New Roof

Before we closed on our house, our inspection revealed that we would need a new roof ASAP. The biggest problem that this posed for us was that we were planning on closing on our house at the end of November (we ended up closing on Dec 2nd). This meant that we would need the new roof put on before the snow fell for the season. This left us about a week to get it done. Luckily, Matt had spent a summer working construction before he went to college and he had made some pretty great connections at that job.

Our nasty old roof and broken vents that let raccoons into our attic:

If you're looking for a great roofer in the Southwest suburbs of Chicago, I would highly, highly recommend Miles Construction out of Lockport, IL. Miles' team came out the day after we closed (Mr. Miles himself came out to our house before we even closed and took measurements and surveyed the work).
They tore off the roof in two days and started putting the new roof on. We were delayed in finishing the project because we had some hail for about two days, but they covered the roof with tarps until they could get back up there and put the shingles on.
Since we were getting the roof done anyways, Matt and I decided to use that opportunity to add two skylights to the front of the house. We got the skylights and flashing kits from eBay for about half of what they would have cost at Home Depot. Miles' team started by cutting the holes for the skylights from inside the house.
They framed the holes out with wood.

And they finished the wood with flashing to make it watertight. I like this picture because you can also see the style of shingles we picked out.

My brother sweeping up some of the construction mess inside. We seriously would not have anything done on this house without the amazing help that we received from our families.

Finally, they installed the skylights. It makes such a huge difference in our front room

Tuesday, February 09, 2010

Home, Sweet Home

Well, this blog has, in the past, been devoted to my ramblings. But since it's been 5 years since I updated it, I'm going to start anew. And I've decided to give it some focus.

Matt and I closed on our home on December 2nd and started removating it that night. We officially moved in about a month ago and have been continuing to work hard since. I'd like to use this forum to document the changes to our house. It's going to be a lot of major changes, so stay tuned.
The house is a 5 bedroom, 3 bath ranch on a half acre wooded lot built in 1979. After we closed, we learned that the house was actually built by Matt's great-uncle. That proved to us that this house was fated for us. Matt's family owned a couple of lumber companies and his great-uncle built this house for himself. It's about 2 blocks from where the lumber yard used to be.

The sellers made buying the house a hassle, but in the end, I feel like we got a great deal for our house. Originally, we were planning on getting a cute little starter home and moving in 5-7 years. That was before we found our forever house. This house needs so much work, but I know that in the long run, it will all be worth it.

Here's the floorplan of the house. The arrows indicate the stairs to the basement, the side door and the front door.

Wednesday, June 22, 2005

I went into a new discount bookstore on Veteran's Parkway today and got a book called "Judaism in a Nutshell:Holidays" for virtually nothing. I purchased this book because, while at the bookstore, I was perusing the Religion/Self-Help section and I realized that (while I have quite a few on Catholisism) I have almost no books on other religions. Sure, I have a Zen book. And I have a books on Greek mythology; but, other than that, nothing. So, I picked up a book on Judaism.
Fast forward from this morning to about 20 minutes ago. I return from Cory's tired and ready for bed. I brush my teeth and wash my face before deciding to quickly check my e-mail and update my blog. Imagine my surprise when I read my MSN horoscope.
Here it is:
Spiritual growth may be an aspect of your development that has been neglected, dear Libra. If so, consider taking steps to bring more understanding of your beliefs into your life. If you go to church, are you learning there? Have you considered exploring other faiths? Consider doing so.

-Weird, huh?

Tuesday, September 14, 2004

I think I lost an earring.

Thursday, September 02, 2004

I miss our cable.

It all started when Cassie knocked on my door and said, "The man in the truck outside just took our cable." Now, readers, you have to understand that this wasn't a huge surprise since we haven't paid for cable since we moved in because we never signed up for it. Cassie left for work and I went on with my TV-free day. The boys came home and I informed them of our new Cable-less situation. (Doug did NOT take it well at all.) We were all simply ruined over the news that we have to actually converse with each other now because that mean man took the buffer that was TV. I went to work. I came home. I listened to Doug yell some more, then I got on the internet to see what our options were. Long story, short: Starting the 9th, we're paying for cable.