Thursday, December 23, 2010

Our Mailbox

When we bought our house, the main entrance was a boring, sad sight: our mailbox was black and rusty, the light was too small for the house (and did not provide enough light), the landscaping left a lot to be desired, moss was growing on the roofs of the barn and the garage, and the gravel was literally coming up off of the driveway.  In a nutshell, our poor outdoor living spaces had been seriously neglected.  We have been gradually improving our yards, but we still have a long road ahead of us.  This summer we devoted quite a bit of time into growing some grass.  We have about doubled the amount of grass that existed at our house when we moved in.  We replaced the light fixtures on the front and the side of the house.  And we have started saving to repave or replace the driveway.


One thing that has bothered me about our house since we moved in was our mailbox.  When we started working on updating the outside of our house, we decided that most of the finishes out there should be copper.  We felt that it would look nice with the overall look of our house and would age well in our area.  The copper mailbox that I have been eyeing was a little out of the budget right now, plus our old one still works perfectly fine (although it's a little rusty).  Still, I felt the itch to spruce up our main entrance a little and turned my attention to the mailbox.  Here's the before:


I am a spray paint junkie.  I'll admit it.  If I don't like something in our house, my first instinct is to spray paint it until I can replace it.  Knowing that I didn't want to fully replace the mailbox right now, but that I did need a change, I ran out and picked up some Rustoleum copper spray paint (that I actually have been planning on using on some old plastic planters in our sun room) for about 7 bucks.  One Sunday (no mail delivery), I took the mailbox off of the house, scuffed it up with sandpaper and applied several extra-light coats of spray paint.  Here it is all scuffed up and ready for the painting: 


I'm thrilled with how it turned out.  My spray paint rampage will continue now that I have had some success with the copper spraypaint.  Here's the finished project:

Thursday, November 18, 2010

Fall Decor

Having never owned a house before, Matt and I had never really gone all out decorating for the different seasons. So, we decided to take a bit of a break from major renovations and get in the spirit of the season by putting up some fall decor.

I didn't bother taking pictures of some of the little things we did around the house like changing out our white candles for butterscotch colored, "harvest" scented candles on our mantle. Our switching out our white candle in our kitchen for an apple scented jar candle.

Some of the larger projects we tried included making a wreath for the door to our mother-in-law room off of our main entrance hallway and setting up a cute little fall area outside our side door (and main entrance of our house). I'm super happy with how both turned out. The original brainstorming resulted in trying to come up with projects that we could put out (at least partially) in September and, with a few modifications along the way, could last us through November.

The first thing I made was the wreath. For a grand total of $15 (everything either on sale or 40% off couponed at Michaels), I picked up the following items:
A ready-made, grapevine wreath
Two packages of burgundy/orange/green berries (on the left side of the above picture)
Two packages of burgundy, orange, and clearish, crystal berries (I intended to use these sporadically throughout the wreath, but after I got the first set on, decided I loved the wreath as it was and didn't end up using them. I still like them though, so I kept them for use in some future project some day.)
1 yard of ribbon
I already had the thread.

I started by laying down the wreath and unwinding my berries. Then, I just started covering the wreath with the berries and tying it off with thread periodically to make sure nothing moved. You can see that some berries fell off the wire as I attached it, I just cut my losses on those and kept going. The wreath looked great without the berries that fell off, so I wasn't too stressed about it.

Here's a close-up shot of the wreath when I was about halfway done:

When everything was done, I tied the ribbon in a bow and Matt patiently held it in various spots around the house while I decided where it would ultimately live. Here's Matt holding it up to the front door:

I finally decided that I liked it on the door of the mother-in-law room. And here's my finished fall wreath hanging in it's final spot:

With my wreath in place, I turned my attention outside. Since we went from college life to apartment living, we had never had trick or treaters. I wanted to set up an area by our side door that looked a little festive. I did not want to devote a ton of time or money to this project, and I wanted it to last all season.

I stopped by a local garden supply store near our house and picked up the following items (along with some bundles of firewood, the grand total came to just under 40 bucks):
3 hay bales
2 mums (one yellow plant and one burgundy plant)
2 corn stalks

On the same trip to Michaels that I picked up the supplies for the wreath, I also picked up:
1 large Funkin (fake, carvable pumpkins)
1 small Funkin
1 small can of Chalkboard spraypaint

I set the haybales up on the edge of our deck next to our door. I used some planters that I had used for now-dead plants over the summer and planted the mums. Matt and I headed to Bengston Pumpkin Farm one day and picked up two very large pumpkins, one medium-sized pie pumpkin, two small pie pumpkins, several mini-pumpkins, several gourds, one medium-sized white pumpkin, and one medium-sized green and white pumpkin.

With all of my supplies acquired, I set to work!

I used the chalkboard spraypaint and completely covered each of the Funkins. I then used some orange chalk that we keep around for when our nephews and/or cousins visit to draw jack-o-lantern faces and write Halloween themed messages on the chalkboard funkins. I arranged the Funkins along with the mums, other pumpkins, and several gourds on the haybales for this finished product:

This arangement was re-arranged about a million times prior taking it down, but this was one option that was up for a short time. At this point, I had "Happy Halloween" and "Boo" written on the chalkboard Funkins. And just for fun, here's a night shot:

So, that wraps up our fall decor. Hopefully, it will be a little more elaborate next year. But, I'm pretty happy with the outcome of this year's decor. What do you think?

Thursday, October 07, 2010

Painting the Sunroom

Like I said in my previous post, our Sunroom was sad before we got our hands on it. While the weather was nice this summer, we decided to hit it hard and make some big improvements out there. After the new concrete floor was poured, we decided to start painting the walls. The walls of the were just plain old wood panelling. We only have screens in the windows out there now, but at some point, we plan to invest in some kind of glass or fiberglass panels to put up in the winter.
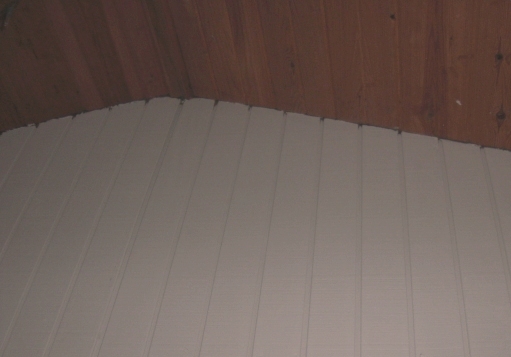
The plan included painting the wood panelling a light cream color (Sherwin Williams color matched a photo we found online into their Harmony-Exterior brand of paint.). This panelling is on three walls of the room (the fourth wall has the same cedar shakes that are on the rest of the exterior of the house). The same panelling is above and below the windows. All of that is the light cream color. The window frames and any other trim in the room is bright white. In the works for next year is replacing the three (currently dark, dark brown) storm doors with white storm doors. The window sill is not being addressed this year. Next year, we will be replacing it with a slightly larger sill that will be stained with some of the leftover stain we used for our hardwood floors (see them again here!). The sill will have a high gloss poly applied after the staining is done.

Here is a color of part of the wall after it was painted.  In person, the color is a little more of a cream than it looks in this picture.  And in the room, the off-whiteness of the color is further emphasized because it's right up next to stark white trim.

Tuesday, September 21, 2010

The Sunroom Floor

Reviving our sun porch has kept us pretty busy this summer. When we moved in, this porch was in pretty bad shape. The plywood floor was rotted and sagging. And it wasn't level. And a family of raccoons were living under it.


Sadly, I do not have many before pictures. This picture was taken before we moved in when Matt and I snuck over to the house one day to take some pics outside. But, you can see the sad, plywood floor and the light fixture. The walls are just made of wood (I'll have some better pictures of the wood in a later post), as is the ceiling.


The first thing we had to do was get this room structurally sound. This meant no more sagging/rotting plywood and no more raccoons living under the porch. We ripped up the plywood to find a thin layer of concrete about a foot under the floor. Matt used to work in concrete and we hired his old company to come in and pour a brand new floor for us. This is the floor after we removed the plywood. Ok, after Matt removed the plywood. He also added some deep-into-the-lawn barriers all around the deck and porch so no more raccoons can move in.


The concrete was poured and leveled all while I was at work. I love this picture because they had to remove one of our screens to pour the concrete. It just looks so strange to me. If you look in the corner of the room, you can actually see where the floor used to come up to on that part of the wall. The old floor was extremely unlevel, so that was fixed for us with the new stuff.
After the concrete was dry and able to be walked on, all that was left to do to the floor (for the time being) was to place our cute new orange and gray rug on it. We picked this 5x7 rug up for a steal out at Nebraska Furniture Mart. My amazing sister-in-law Sara was nice enough to let us store the rug in their garage until we had a car in the area to pick it up and drive it back home. Sadly, the only picture I currently have with the rug in it is actually a picture of my favorite rug and floor durability tester.

Thursday, June 17, 2010

Jack

Hello Blogging world!

I know it has been a while since I posted. That's not because we haven't been completing renovation projects, we have. I've just been a little busy. We got a new addition recently that has taken up a lot of my free (re:blogging) time. So, without further ado, allow me to introduce Jack.


He is an Australian Cattle Dog, but I think he has some German Sheppard in him too. He is two years old and is super well behaved. Matt and I both just adore him and he already has us wrapped around his little paw.

I promise to get some more updates of the house up soon.

Thursday, March 25, 2010

Tub and Shower

Our main bathroom was in dire need of some updating when we moved in. The first things we did to it were to paint the pepto pink walls a nice shade of blue and replace the light fixture. Then I painted the vanity dark brown (instead of an orange-y oak color). The next project we decided to tackle in the bathroom was the tub area. Again, I don't have a ton of before pictures of this area. Basically, it consisted of a dark almond colored tub with stained once-white tiles. Most of the fixtures in the tub were gold except for the drain and overflow cover thing that were silver. The grout was coming out from between the tiles and the tub had some water stains that I couldn't get out. Basically, It did not look good.


Here's what the old fixtures looked like. You can also see how stained the once-white grout had become.


We started the tub demolition by removing all of the old tile. We just used chisels and hammers to get it all off. Honestly, this part of the process was very easy since most of the tiles were loose anyways.


Once we'd removed the tiles and the cement board, it was time to adjust the plumbing. Matt is 6'3". The old shower head was at under 6' on the wall (Maybe 5'9"). Poor Matt had to crouch down to wash his hair. Since we were adjusting some of the plumbing anyways, we used this opportunity to raise the showerhead to a Matt-sized 7'. Here is the updated plumbing.


After removing the old cement board around the tub, we were ready to glaze. I LOVE how it turned out. Here's Matt about to start the second coat of glaze:


The whole process was so easy and made a HUGE difference. We used Rustoleum Tub and Tile Refinishing Kit. It can be found here. At just over twenty bucks, this was a great option for us that turned out so much better than expected. Here is the tub after three coats of glaze.


After the tub was glazed, we put up the new cement board. In hindsight, I might have put this up prior to glazing the tub (we wanted to make sure that the lips of the tub, what the cement board covers, was also glazed). I might have even waited to glaze until we were finished tiling (but before we grouted). We dropped a few tiles or trowels while we were tiling and had a few little areas of glaze to touch up later on.


Matt then put in our new (Satin Nickle) drain and overflow cap thing. I'm so excited to get rid of my two-toned bathroom and have all of my fixtures match! Ignore the dust from putting in the new cement board, please...


OK, I know it's not technically a part of the tub and shower as this post is called, but during our shower renovation, we took a little break to put in our new dual flush toilet and I just couldn't wait to show it off. I am seriously in love with it! We went with the Glacier Bay Elongated Dual Flush High Efficiency found here. We got it at Home Depot on sale for an affordable $118. The price has since gone up to $158, but that's still cheaper than most dual flushes on the market. We love it and had no problems installing it. I plan to do a whole post on it eventually, but I couldn't resist a sneak peek.


Alright, onto the tub surround. We actually bought a wet saw (for crazy cheap off of Craigslist) for this project, knowing we would be using it in the future for all our tiling needs. At first, I was a little afraid of using this one. It's very loud, and very wet and unlike any tool I've used before. But, once I'd practiced on several tiles, I felt like a pro. I love how it works and it has been super easy to use.

As neither Matt or I had tiled before, I decided to take a free class on tiling offered at Home Depot. Information on the course can be found here. I highly recommend this class for a beginner. The tile experts at Home Depot taught me how to apply quickset, lay tile, and grout. They answered all of my crazy questions and were great with letting me get some hands on experience before doing it on my walls. We chose 6" Travertine tiles with a 1/8" grout line for our bathroom. While browsing at Tile Outlet, I saw these tiles and just fell in love. They fit perfectly into this bathroom and I couldn't be happier with our choice. Once we started tiling we were so impressed with how it started looking. Here are the first three rows applied. As we are using such small tile, we stop every two rows to level the top of the tiles and move them around as we need to.

We finished the back wall of the tub in one day and moved onto the side walls. Here is the back wall all finished (well, minus the grout). I just love this tile.

Once we got into a rhythm, the tiling really started going quickly. Here is the back wall completely finished and the start of the shorter side wall.

After tiling was completed, we moved onto grout. Sadly, I was too busy working to take any pictures (don't worry, I'll take plenty during our next tile project). After grout was in and dry, Matt applied Silicone to any corners where two walls met or where the walls met the tub (the below picture was taken before the silicone was completely cleaned up). The new fixtures were installed, the shower curtain was hung, and we were shower ready:

Tuesday, March 23, 2010

Lighting

All of the electrical in the house was a mess when we got in there. Luckily, my grandpa (Papa) is an electrician (as well as 3 of my uncles). He has been instrumental in getting our electricity running like it should. My dad was an electrician too, and, dare I say, I'm not too shabby with basic electrical projects (changing outlets, etc).


The light fixtures in the house were dated when we moved in. A lot of very 1970s style. We're working on replacing all of the fixtures in the house. So far, we have replaced the light fixtures in the kitchen, the two main bathrooms in the house, the hallway, the front porch and next to the side door. We also completely removed the ceiling light fixture from the front room. Sadly, I didn't get really great before pictures of all of the fixtures before they were removed. But almost all of them had pink and brown flowers painted on off-white or frosted glass. I am in no way joking. Most of our new light fixtures were purchased off of eBay for half the price of Home Depot or Lowe's. Our outdoor fixtures are from Menards. I did a lot of shopping around for our fixtures and I am so glad I did. We were literally able to save hundreds by looking around for the best deals on what we loved.


This was the light fixture in the front room. No brown flowers on this fixture, but there are the gold swirls on the fan blades. Another few things to note about this fixture: The base is too wide for the beam and hangs off about two inches on each side; the electrical cord actually runs up the beam, to the wall, to the floor, down the floor to another wall, and up that wall to an outlet that is controlled by a switch on the other side of the room.


This was the kitchen light fixture. You can see some of the flower/paint work on this one. This was a fan (with brown blades with gold swirl paint on them). We had removed the fan blades to get to the popcorn ceilings a little easier.
New kitchen light fixture. I love this fan. Beautiful light, reversible fan blades. Gorgeous! It's so much more my style.


This was the light fixture in the pink bathroom (now a beautiful shade of blue!). You can't tell from this picture, but there are brown and pink flowers painted on the off-white glass of the fixtures. The fixtures hung from a rusted gold chain (which matched the silver faucets beautifully), and gold ceiling hooks.

Matt hard at work putting up the new fixture in the now blue-ish bathroom:


Papa putting up the new fixture in the little bathroom. I don't have a before picture of this fixture, but it was a gold and off-white glass two-armed wall sconce. Only one of the arms worked. The other would blow the bulb out as soon as you screwed it in and turned it on. We went through probably 5 bulbs before we just changed it out.


The picture is a little crooked, but you get the idea. This fixture fits the bathroom a lot more in both size and style. Thanks, Papa!

My sewing room makeover has been a wonderful experience. Again, I plan to do a whole post on just this room, but the light fixture was such a huge improvement that I decided to put it in this post too. This is the before picture. Lots of gold swirls on the fan and lots of flowers on the light.

And here's the updated fixture (ignore the patching on the white wall, we were mid-painting when the fixture got here):

Our hallway had one of the plain white globe lights that were all over our house when we moved in. I found this light fixture at Lowe's and knew it was for us. The light the it gives off is perfect for our little hallway. Here is the old light fixture (after we scraped the popcorn ceiling but before the dry wall went up. It looks like a different house!).

And the new and improved one:

Our old outdoor light fixture on the side of the house. UGLY. And it didn't give off much light.


Matt putting up the new light fixture. The electrical behind the old fixture needed a lot of help. Our beautiful new fixture automatically turns on at dusk and turns off at dawn. It also dims when no one is around and is motion activated to get brighter when someone or something walks by it or a car pulls into the driveway. We loved it so much, we bought a second one for the front of the house.

Thursday, February 18, 2010

Paint

Once the drywallers were finished with the walls and ceilings, we were ready for paint. We basically took an entire weekend and painted the five main rooms of the house (kitchen, front room, bathroom #1, bathroom #2, master bedroom). We used Sherwin Williams' Duration paint for basically our entire house. It's awesome because it is low-VOC and low odor. Making it not only better for the environment, but a hell of a lot more pleasant to actually use. Plus, you can scrub it clean if something spills on it. Trim and doors are done in a semi-gloss finish and walls and ceilings are an satin finish.

Here's Matt's mom taping off the kitchen ceiling. We chose to leave the two wood panelled walls in the kitchen rather than dry-walling over them. At this stage, we are planning an entire kitchen remodel in the not-too-distant future. So, the only thing we painted in here on our first go-around was the ceiling (we painted this so we could install the new light fixtures). The ceiling in the kitchen is painted Sherwin Williams' Modest White (we loved this color so much, you'll see it again and again in our house).

Our bedroom was the first room we painted (we wanted to be able to get our furniture in there STAT). Here's what our bedroom looked like before we got our hands on it:

All of the trim was painted Sherwin Williams' Pure White. The top portion of the walls is painted Sherwin Williams' Sporty Blue. The bottom portion of the walls and the ceiling are Sherwin Williams' Modest White. Here's my mom fixing some of the little areas where the paint seeped under the tape.

After the bedroom and kitchen ceiling, we moved onto the front room. We used an extension ladder to get all the way up to the vaulted ceilings. We primed all of the drywall and the small bit of wood that we'd chosen to leave on the walls. Drywalled walls are painted Sherwin Williams' Grayish. Woodpanelled walls are painted Sherwin Williams' Functional Gray.


Priming the wood panelled walls took forever, but it was totally worth it (a special thanks to our friends Mike and Nick for the help). I love how this little nook looks.


This is the front room painted after all of that priming. I love the slight contrast between the wood walls and thr drywalled walls. Radiator, closet doors and, eventually trim, are Sherwin Williams' Pure White. This picture was taken prior to the trim being put up. That'll be another post.


The largest bathroom in the house (and the one Matt and I use the most) was Pepto pink when we moved in. I'll be honest, it was hard to be in there for more than a minute or so when we first moved in.

This bathroom has been painted Sherwin Williams' Tidewater. The ceiling is Modest White. The closet doors, trim and the vanity are Sherwin Williams' Turkish Coffee. You can see a little of the Turkish Coffee on the mirrors.


My sewing room is quickly becoming one of my favorite rooms in the house.  Before I got my hands on it, it was all white with, you guessed it, wood panelling!  Here's the before (and my fantastic father-in-law helping us get ready to remove the popcorn from the ceilings!): 

We painted the walls Sherwin William's Essential Gray in an Eggshell finish.  The trim and wood wall were primed and painted with Sherwin William's Pure White in Gloss.  The first picture is my little photo montage to some of the costumes I recently finished (a little more on how that came together soon), but in the picture you can see the wall color and the trim.  The second picture is actually the same corner of the room that we saw in the before picture above.  It shows the wood wall halfway through painting (hence the splotches in the upper corner where I realized I still had a little spackling to clean up).  This picture was taken before the ceiling was painted, but it still gives a good idea of the wall colors.